
A pretty popular alternative to the original FDD is a replacement drive that allows plugging flash storage and using it instead of disks.
Gotek drive with HxC floppy emulator software for Amiga is a very good and affordable device. It is possible to install it in place of the original FDD in most Amiga computers, but the problem starts when you have more than one computer and want to use the same drive with all of them (or you have CDTV which does not have internal drive). Reinstalling the drive each time is pretty inconvenient and puts the old and worn out hardware at the risk of damage.
A solution may be to install the Gotek drive in an external FDD closure and use it as a secondary drive (DF1 by default). This will keep the internal drive intact.
- For machines with Kickstart >=2.0 it should be possible to select this external drive from the boot menu by pressing both mouse keys when booting.
- For Amiga 500 with Kickstart 1.3 it is possible to boot from the external drive with an additional hardware mod.
Below we will focus on how to install the Gotek drive in the external closure only. These are both drives:


The result of putting of the Gotek inside the case is not nice – the connectors do not line up.

We can make an adapter from an old FDD cable and a 2×17 pin dual row breakaway header.

First, we need to push the pins in the header a bit so they are more or less of equal length on both sides of the plastic insulator. They should be easy to move one by one. Then we can use it to attach the cable to the Amiga drive.
Unfortunately, connecting the other side of the cable directly to the drive will not work. In a straight tape cable, the rows will be exchanged between the drives.
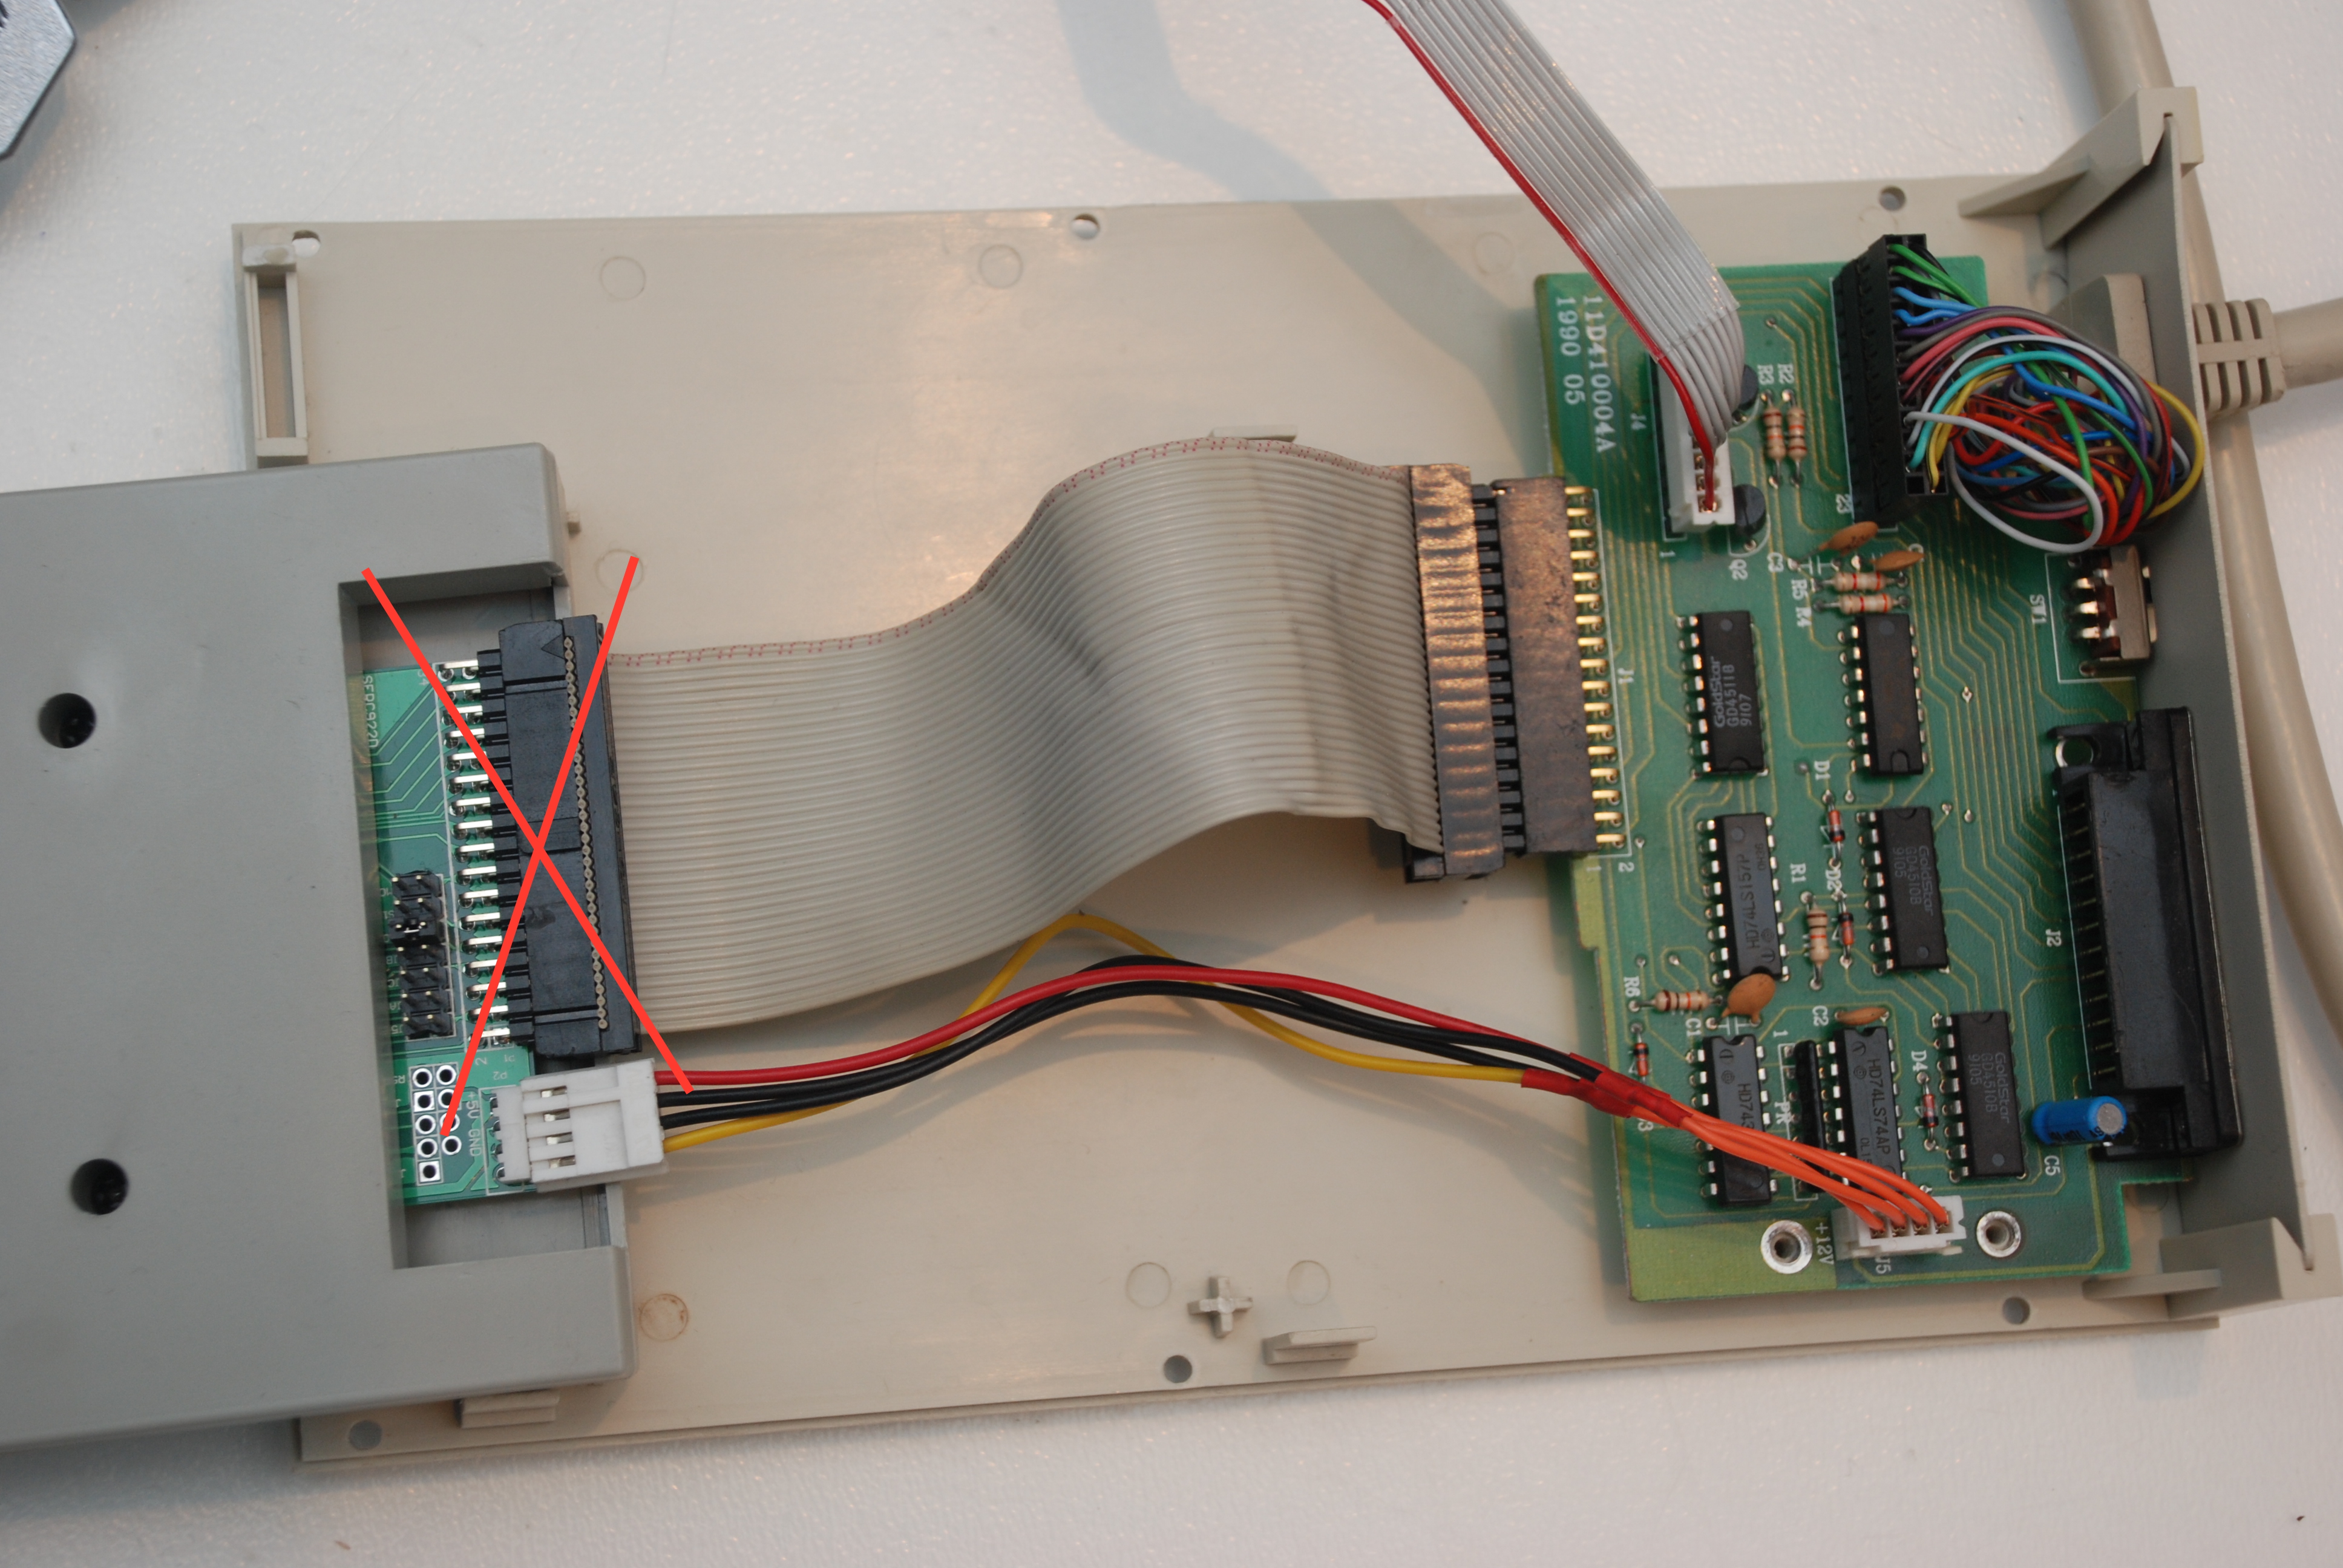
We need to switch the rows on one side of the cable. Happily, all the pins that matter are located in the top (from the board) row of the drive. The bottom row is all ground. It is enough to move the tape connector up one row and just plug the lower row of it into the upper row in the drive. Additionally, we will use an extra single cable to link the other rows with each other (any pins will do the job). In order to easily plug the cable onto the pin, it is best to find a cable that already comes with a tip clamped on it, removed from some connecting block.


Finally, assembled, working and good looking Gotek external drive with Amiga CDTV:

I am now not sure the place you’re getting your info, however great topic. I needs to spend some time studying more or working out more. Thank you for magnificent info I was in search of this info for my mission.
Hi I spent about 2 hours trying to get this working but just can’t manage it with my external drive!
Whatever I do the gotek is just recognised as DF1:??? in workbench and I can’t boot from it if I select it.
The weird things is that the gotek works fine if I just fit it straight in the amiga as DF0 internal drive.
When I fit the floppy back in the external enclosure that works great and I can boot from it both on an amiga 1200 and 600. But with the gotek it won’t work.
I’ve tried plugging the floppy ribbon upside down, straight in and also straight in top row with the earth/ground jumper as you mention, as well as upside down with the jumper too!!
Do some external drives work differently or can you help at all for me to get this working?
Thanks for any tips to diagnose the problem. 🙂
Hi. Could you post some photo of your enclosure box?
Can you try to connect Gotek directly to the enclosure circuitry without the ribbon cable and see if it changes anything?
Thanks
Pawel
Hi thanks and sorry for the slow reply. Turned out it was a dodgy ribbon cable so thanks once again it now works!