


Resources
Wiki
lowendmac.com (OS downloads)
Gamba (many useful links, including OS compatibility matrix)
freaknet.org (schematics)
Apple Macintosh SE is identical to Macintosh SE FDHD, the FDHD mark was added to note the inclusion of a hard drive, missing in the base SE.
Documents
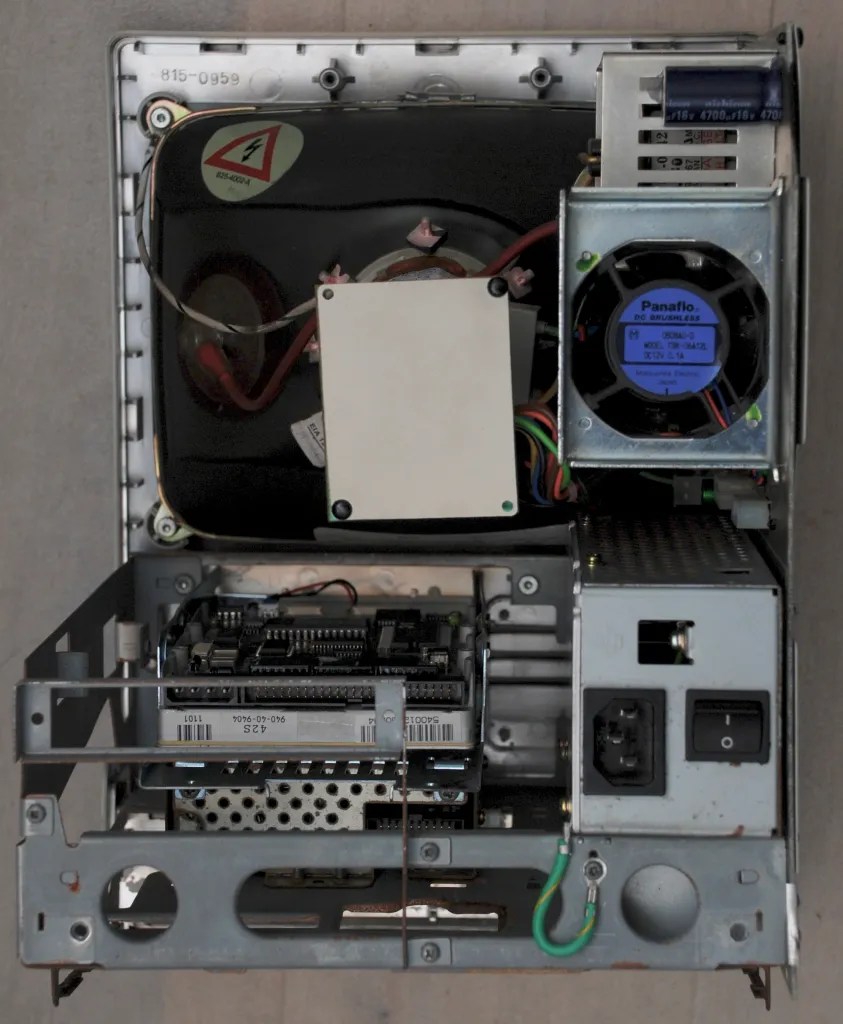
Internals
Motherboard
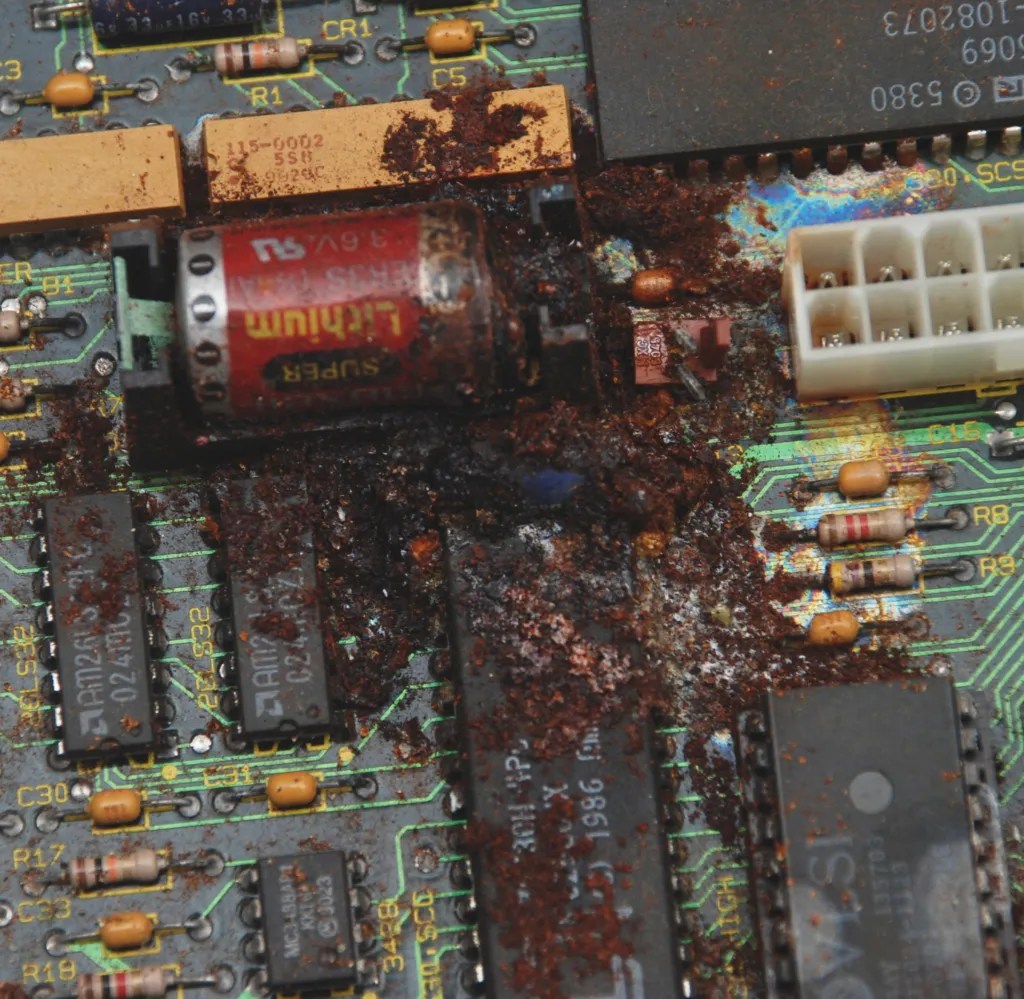
Motherboard on my Macintosh was severely damaged due to a battery leak. It reminded of a post-war landscape as seen from an aircraft.

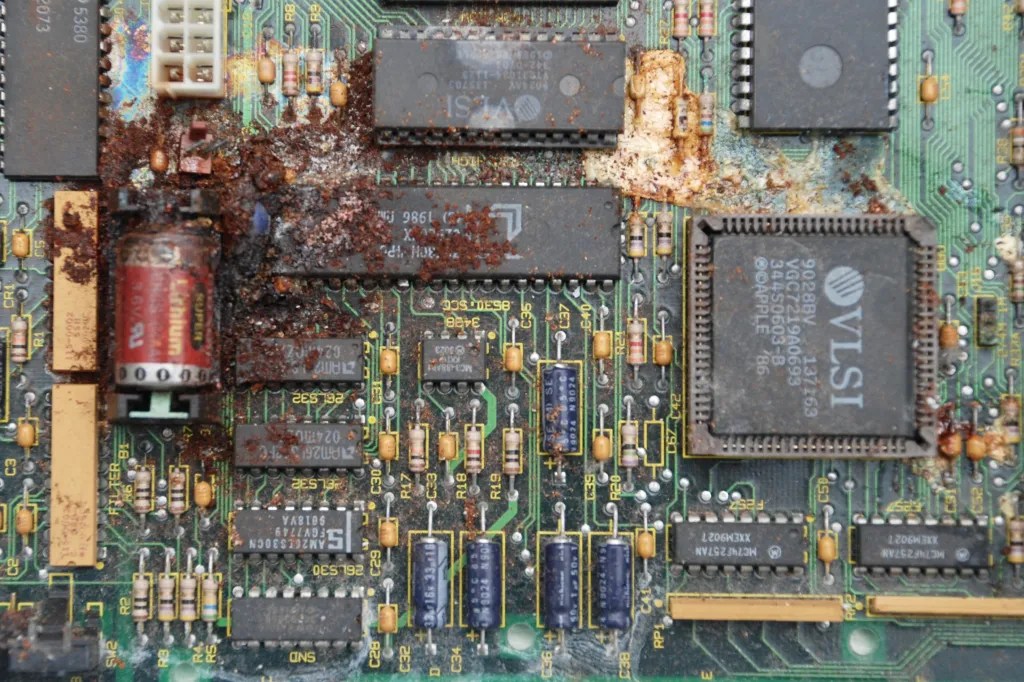


I was convinced this was a mission impossible to restore it, but decided to give it a try. To my surprise, after spending a night on it, my Mac powered on correctly and was able to boot from floppy and hard drive! So far it seems to be working just fine!


A short guide what I did to fix the board is at the end of this page.
Pictures of another board that has not been damaged:


Tube and analog circuitry


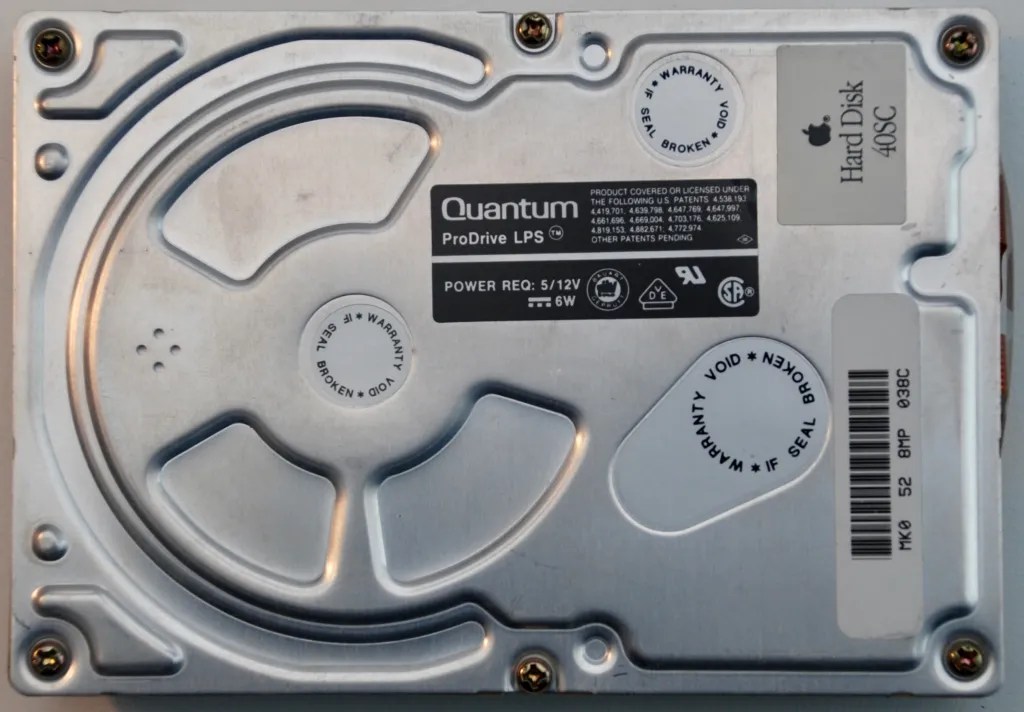
Hard Drive
There were two types of SCSI HDD installed in Macintosh SE: 20MB or 40MB.
20MB MiniScribe 8425S:


40MB Quantum ProDrive LPS:


Floppy Disk Drive
The original Macintosh SE came with 800KB dual-side double-density floppy disk drives: Sony MP-F51W-23.


The upgraded version of Macintosh SE, called FDHD contained 2MB floppy disk drive: Sony MP-F75W-01G, also put into later Macintosh SE/30.


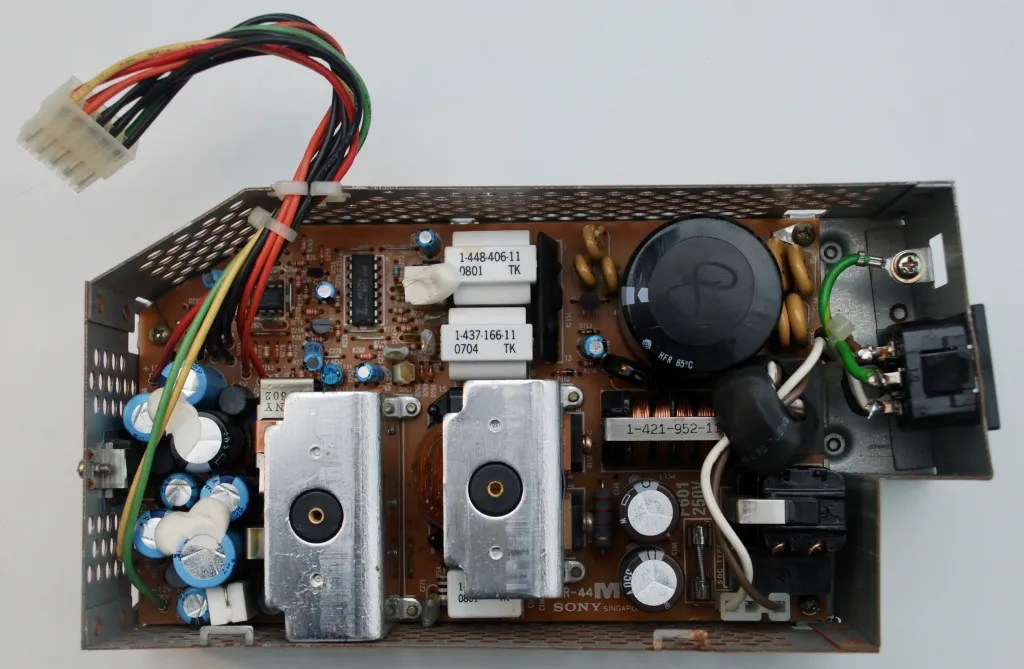
Power Supply


Keyboard


Reassembly


It’s working!


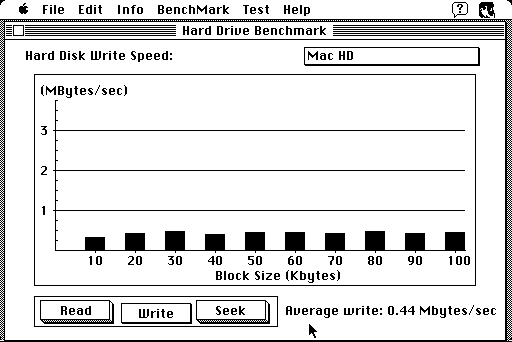
Benchmarking
Some results using Snooper 2.0 test and benchmark utility:


Fixing the battery leak damage
Here is what I did to get the motherboard in the order:
- Remove all removable chips from the sockets.
- Use compressed air (from a compressor, not canned) to clean the loose dirt and remove the remaining leaked battery fluid. The fluid is likely under the sockets and chips. If you direct the air below them, you should be able to sweep it through all the board until it reaches an edge of the board and drops out. I used pressure up to 8 bar (gently, from a distance) and sprayed the board for more than 30 minutes.
- Use home vinegar and ear buds to clean all the spots on the board. Wet them, wait for a minute and remove. Don’t scrub aggressively and don’t wipe the circuits out. Remove and wipe excessive vinegar, you may also use solved baking soda to neutralize it.
- There will be many soldering points, where the battery fluid did its damage and bare copper is visible instead of solder. You need to re-solder each of them, using rosin flux.
- Replace broken components (usually resistors and capacitors).
- Solder extra wires where a circuit is broken or scrubbed.
- Clean the pins of all previously removed chips and replace them.
In my case it worked for the first time! I also experienced a few other stability issues as I was reassembling everything:
- Fatal exception 0xE (sad mac icon): this was due to memory boards connectivity issues – needed to reposition them is the sockets, push here and there and it went away.
- Instead of the picture: a single horizontal line in the middle of the screen or a narrower one (about one-two inch wide) – this was due to connectivity issues of the square VLSI chip on the board. Fixed by cleaning the pins and inserting it more firmly in the socket.
Although the wiki says the 3.6V on-board battery is required to run the Macintosh, my Mac ran without it until I got the battery replacement. Same story with 33uF capacitor below the battery, which was destroyed by the leak. It ran without it.
1 Response
[…] the most severe battery and capacitors leak I have seen at the time, worse than in case of Macintosh SE. It has been successfully fixed! After thorough cleaning with air compressor and IPA, I replaced […]